Let’s talk about dowels. For years they have been the lesser cousins when it comes to joinery for furniture. They are often as maligned as butt-joints, but is the “dislike” warranted?
There are of course many ways to join two pieces of wood. For joining corners the most popular method is often dovetails – for aesthetics alone. Are dovetails always practical? You can make them by hand, or use a jig and router to speed things up, but they aren’t the be-all-and-end-all. Hidden joints are done in many ways – some people like using the tenons of Festool’s Domino system (the system is nice, bit pricey for the home user), others sliding dovetails (nice looking, but a lot of work for being mostly hidden), and still others use dowels.
The Stanley No.59 dowelling jig
Plain old dowels. The word dowel is an old English word analogous to “doule” which simply means a part of a wheel. It can also be traced its history in the Middle German language “dovel” which meant to plug. Now dowels have been around for quite a while. Viking longboats used trunnels (tree-nails or big dowels) to hold ribs together, and dowels were used to pin structural members joints together in buildings. However the use of dowels in furniture construction came as a late development, appearing in the early 19th century as an alternative to mortise-and-tenon joints.
For many years many woodworkers have shied away from them. This may be in part because of poor experiences with dowels in a certain self-assembly flat-packed furniture. But dowels are actually ideally suited to building with plywood, especially Baltic-birch. The multi-layered form of plywood is not well suited to the likes of dovetails, or mortise and tenon joints. It is also an ideal way of joining solid wood.
It also may be because the old-type dowel-jigs have always been somewhat mediocre. They weren’t really designed for placing dowels along the edges of large cabinet carcasses, or on mitre joints. The early ones, like the Stanley No.59 were versatile in application, but suffered from only being able to drill one hole at a time. The newer ones include the Veritas Dowelling Jig, which is good at some tasks, but not the most optimal solution , and the Woodpeckers Ultimate Dowelling Jig 2.0, one of their OneTIMETools… too short lived to form any sort of opinion on. But then there are what some consider the game-changers, the DOWELMAX and JessEm jigs. These tools let you put dowels in just about any configuration (each has its own pros and cons).
The Dowelmax…
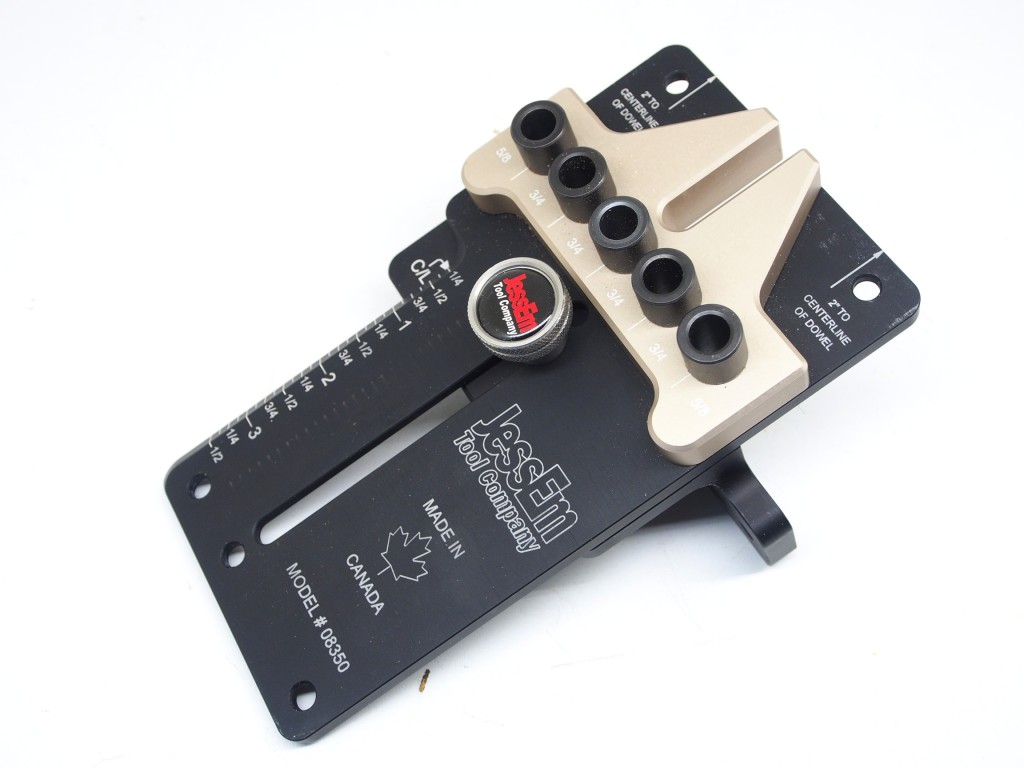
or the JessEm?
Then there is the dowel pins – spiral-grooved or multi-groove. The grooves, or flutes allow air to escape and glue to fill the voids as the dowels are inserted. Without them, it is possible that the dowels would not be able to be inserted completely into the hole. There is no real definitive answer as to which has the better holding power, but both are infinitely better than smooth dowels (unless the dowels are to be used in through-dowel situations where they are exposed). The dowels are generally like pressed-beech biscuits, with the compressed wood in a ⅜” dowel expanding about 1/32″ (0.8mm) on contact with moisture in the glue, creating a tight fit.
Dowels offer a convenient, inexpensive way to make a robust joint. They can give incredible strength to mitre-joints, and make carcass joinery quite efficient. Whether you choose to use them is really up to you, but they offer a method of joinery that is both inexpensive and sturdy. But how strong are they really? Well we will tackle the concept of dowel strength in the next post.
At the moment I have very little time for the actual woodworking I would like to do – partially due to the cabinetry I’m building for the basement, and renovations that have taken too many years to finish. Years ago when I drywalled the basement I left cavities in some of the walls in which to insert bookshelves. These are utilitarian bookshelves made of maple (5.5″ deep) – sturdy enough to hold paperbacks, DVD’s and probably all the planes in my workshop – they are somewhat overbuilt. Due to the fact that they are in the walls, making aesthetically pleasing joinery is not a problem – it won’t be seen. Like the walnut shelves I’m making in the bathroom – in inconspicuous places where joints are hidden, I don’t need dovetails, and I loath 45º mitres. So five years ago when I was building the myriad of doors in my 6′ high basement I bought a DowelMax.
Fig 1: Shelves made using DowelMax
Miller Dowel System
Prior to the DowelMax, I bought the Miller Dowel System – which is a clever system which works well in certain applications. This system relies on stepped dowels and a hole drilled from the outside, i.e. the end of the dowel is exposed – and herein lies the caveat: as the dowels are shaped lengthwise with the grain (to increase their strength), when the dowel is inserted into the hole and trimmed flush (after allowing the glue to dry of course), the resulting “plug” is end-grain. This doesn’t present a problem in situations where the wood will be painted, or stained (or less noticeable in walnut), but in maple the dowel ends become quite prominent. I still use them, but in situations where showing the dowel end can be used aesthetically, or is hidden (e.g. by books). At C$8-14 for 40 small dowels (2 5/8″), they aren’t exactly cheap either.
Fig 2: The Miller dowel system
DowelMax – what’s in the box
The DowelMax kit I bought is pretty comprehensive (they don’t sell this particular kit anymore). The standard jig set-up shown in the left of Fig.3, works for 3/4″ boards – the spacers allow for boards of different thickness, e.g. add the 3/4″ spacer for a 1-1/2″ thick board (nominal 2″). The index pin allows for multiple holes along a boards length by moving the jig and setting the pin in the end collar. Similarly, the distance gauge can be used to maker larger spaces between holes. By modifying the position of the components on the jig, holes can be placed on the surface, or end of a board. The L-bracket allows for making dowel holes along the surface of a board in a T-type configuration, e.g. for shelves. All the parts are precision engineered, and after five years of use show little in the way of wear.
Fig 3: DowelMax bits and pieces
DowelMax – how well does it work?
I use my DowelMax to do butt-joints. In utilitarian cabinet making, not much else is needed. Yeah I love dovetails too – but they take time, and in instances where the joint is not visible, does it really matter? So number one use – joints where I won’t see the joint, or where the joint is nice enough that it doesn’t matter – corners, shelves, and attaching frame trim to cabinets. If you have 45º mitre joints on boards that are wide enough, they work well there too. I also use it to make wider boards by joining them on the long side.
Fig 4: The DowelMax in use.
The jig can be reconfigured to multiple arrangements to deal with boards ends/edges or faces (Fig.5).
Fig 5: Setups for end/edge and face dowelling
It is also possible to use the L-bracket to create T-type joints (Fig.6), for example for bookshelves.
Fig 6: L-bracket and index pin
So how well does it work? Incredibly well – as long as, likely any other type of joinery, the joints are well aligned. My one quibble? – It would be nice to have some sort of removable “stop” or tab on the end of the main jig block to make registration of the face of the jig block with the wood face easier (similar to the one on the Viel jig or Joint Genie maybe?). Amazingly, earlier prototypes actually had end stops, but they were removed because they were deemed unnecessary.
Fig 7: The Viel jig
When using the L-bracket to make holes for T-type joint such as a shelf, it can be somewhat challenging to align the jig accurately – and it requires a line 1/8″ below the actual position of the shelf to position the jig (see Fig.8). Also nice would be an improved L-bracket that would register the jig at 90º perpendicular to the edge, *and* clamp it would make this a much easier task.
Fig 8: Using the L-bracket
I have used the jig to build shelves, doors for my basement, window sill/box for the windows in the basement (they are 12″ deep), and book doors (i.e. bookshelves that function as doors to closets). I’ve never had issues with it apart from the odd misalignment, which isn’t the end of the world.
The dowels and drill bits
I tend to use the expansible dowel pins sold by Lee Valley and manufactured by JustJoinery, known as “The Pin With a Memory”. The drill bit that comes with the 3/8″ system works extremely well, allowing the pins to be test-fitted (the drill is actually 9.7mm). Recently I decided to augment the system by having one drill bit for the 1½” dowels and another for the 1″ dowels – this is way easier than changing the stop-collar. In cases where a butt joint is made of a ¾” stock, then I tend to use 1½” dowels, with ½” set in the side of the board, and 1″ set in the end of the board.
Fig 9: Dowels and drills
I bought a 3/8″ HSS brad point drill from Lee valley and a set of stop-collars. This drill is marginally smaller than the one supplied with the DowelMax, and so makes it more challenging to remove dowels after test-fitting. This drill is actually the equivalent of 9.525mm, hence the tighter fit. Dowel holes should also be slightly longer than is needed. However on the up-side, the brad-point makes it easier to drill in end-grain. Fig.10 shows four dowel-pins in a 6″ board, and a cross-section through a dowel-pin used to edge-join two boards.
Fig 10: The dowel pins
Don’t use too much glue – it will squeeze out of the spirals.
How strong are the dowels?
A number of studies have looked at the strength of the DowelMax joints in comparison to other joints – and the strength of the joints made using DowelMax are better than many systems. Here is a link to the testing on the DowelMax website. Issue 219 of the British magazine Furniture and Cabinet Maker also has an analysis of six joint types. Here are the results with respect to the PSI value where the joint failed.
Biscuit 180 Domino 400 Mortise and tenon 420 Pocket hole 280 Zeta P2 system 180 Dowelmax dowel system 680
Final thoughts
Overall it’s a great jig, however there are now competitors in the market place that offer more in the way of functionality – they require the use of external clamps, but offer more in the way of alignment. The DowelMax is expensive – but consider the time involved in doing it any other way. You could pay more for a Festool Domino, but unless you have a cabinet shop, it may not be worth the investment. Sadly, the DowelMax is no longer made in Canada (and there is a long thread discussing this on the Canadian Woodworking forums if you are interested). The standard kit is now US$249 – I paid C$325, which included the L-bracket (now US$15), and a ¼” spacer (now replaced by 1/8″ spacers at US$8.50 a piece).
What about the JessEm? Well, I have been thinking about a ¼” / ½” dowelling assembly, so I might just get one of these to try out as well sometime in the future. They also have a cool looking Mortise Mill.
Availability:
Split-depth collars for drills (imperial) – Lee Valley Expansible dowels – Lee Valley (3/8″ x 1-1/2″ – C$6.90 for 100). These are the ones for the 9.7mm drills. You can also buy them direct from JustJoinery. They sell the same set for C$5.80, but also sell them in sets of 1000 for C$53.90 (they sell the standard 3/8″ dowels as well). There is somewhat more selection at the JustJoinery site, as they also sell 3/8″ dowels 1-1/4″ and 3″ in length. Also if you are looking for beefier dowels, they have them in 1/2″ and 5/8″ diameters. (The JessEm handles 1/2″ dowels).