A German wooden block plane

There are very few wooden block planes out there. This is partially because it is challenging to make a wooden block plane with a low bedding angle. One of the few available today is from German manufacturer E.C.Emmerich, (E.C.E.) founded in Remscheid, Germany in 1852. E.C.E. are well known for making a unique series of wooden planes with blade adjustment mechanisms. Whilst not as prominent in North America, the use of wooden planes is still common in mainland Europe.

ECE

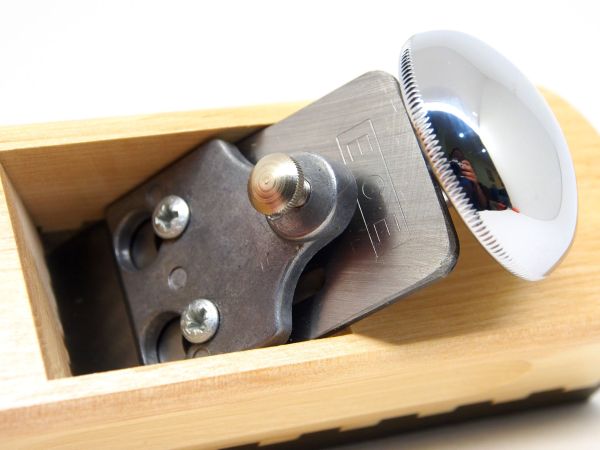
E.C.E. make one block plane. While not a true block plane, it is pretty close, and is good at planing grainy wood. The 649-P “POCKET” block plane is a 6-inch plane with a body made of hornbeam and a sole made of lignum vitae. The blade is 1½” in width, and bedded at 50º. The lignum vitae sole of the plane is attached to the body using an intricate bi-directional finger joint. Lignum vitae is the ideal sole for a wooden plane because it is heavy, and dense, and as such will attract very little wear. It is also naturally oily, thereby producing less friction during cutting, and making the use of wax on the sole unnecessary.

ECEsole

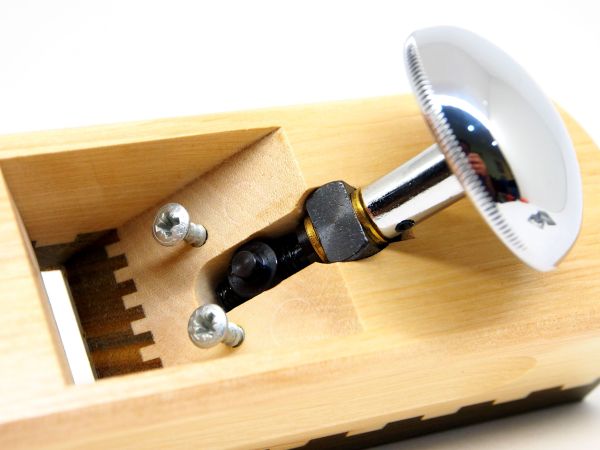
The body of the plane is made of hornbeam, an extremely hard wood sometimes known as ironwood. Hornbeam (European) is quite unique to the usual use of beech in wooden planes, and has a slightly higher Janka hardness (1630). The most interesting thing about this plane is the blade adjustment mechanism.  Its lever cap is a simple aluminum one which is attached to the body of the plane with two wood screws which pass through holes in the blade. Note that this, unlike most other block planes is a bevel-down plane. The blade is bedded at 50º (York pitch), meaning that it is ideally suited for use on hardwoods, or woods that have highly figured grain. The blade can be adjusted without loosening tension so small adjustments can be easily made.

ECEcap

The blade adjustment mechanism, used for depth adjustment is installed in a cavity in the body, thus allowing the bed of the plane to maintain its dampening effect on the blade (reducing chatter). The mechanism itself is a simple threaded assembly with a carriage and pin that engages a hole in the blade. The blade is adjusted by moving the mushroom-like adjustment knob attached to the thread. Moving it clockwise extends the blade below the sole, counterclockwise backs the blade off. This knob has the dual purpose of a palm-rest whilst planing. The negative with this set-up is the potential to inadvertently change the depth setting of the blade by rotating your palm, however there is 1/3 of a turn of give before the cap engages the screw in either direction.

ECEadjust

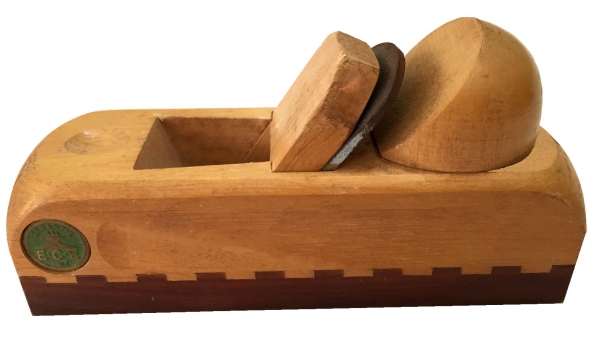
Lateral adjustment can be achieved by grasping the iron at the top near the adjustment knob and pushing it left or right as required to make the edge of the cutting edge parallel with the sole. Finer adjustments can be achieved using a plane hammer. This plane originally had a traditional wood-wedge to position the blade, and wooden palm rest at the back of the plane. Beyond that little has changed.

oldECE2
An older version of the ECE block plane

Mid-century Danish nested tables

At the moment our house is going through a mid-century modern revival. Apart from the dining room and living room being painted white, we are replacing some pieces of furniture which have seen better days. On the lookout for a small side table for the living room, we came across this unique set of nesting tables.

cubeNested3

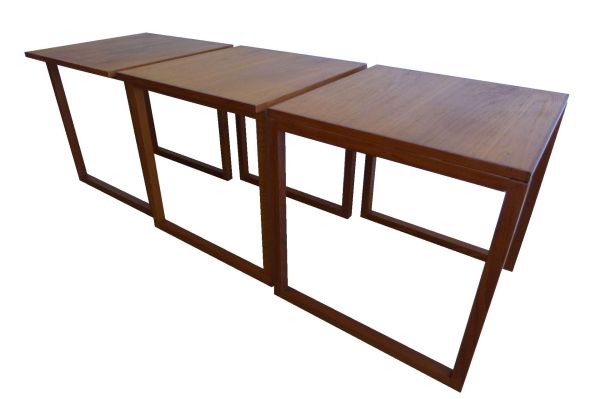
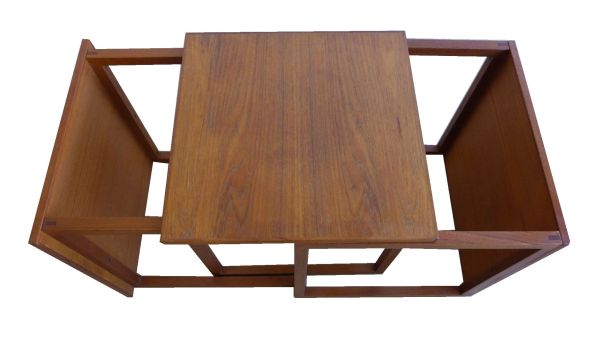
It turns out they are cube nesting tables designed by Kai Kristiansen for Vildbjerg Mobelfabrik. The tables are all the same size; however, each table has the legs spaced closer together than the previous one, so all three can be placed together in a cube formation. It is a truly innovative way of nesting three tables.

cubeNested2

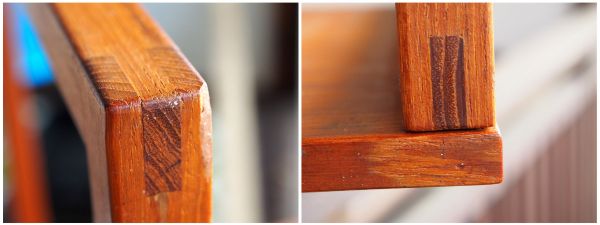
Construction of the tables is a simple affair. The ½” tops are teak-veneered with a 1/8″ teak edge banding. The legs are squares joined using a corner bridle joint in each corner (the stock is 7/8″ teak). The legs are attached to the tops using three flat-head screws each. Would likely be easy to replicate.

cubeTbljoints

The Millers Falls No.1 spokeshave

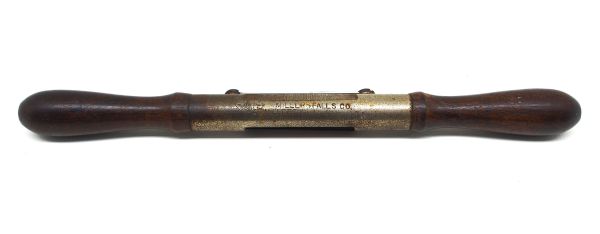
One of the more interesting Millers Falls tools is the No.1 cigar-shaped spokeshave. The spokeshave was sold from the late nineteenth century, until approximately 1910. It is possible that in the context of a workshop, the cutter was two finicky to adjust, or maybe just too difficult to use, eventually leading to it disappearing from the market.

MFno1_1

Fig.1: The cigar shaped spokeshave

MFssNo1

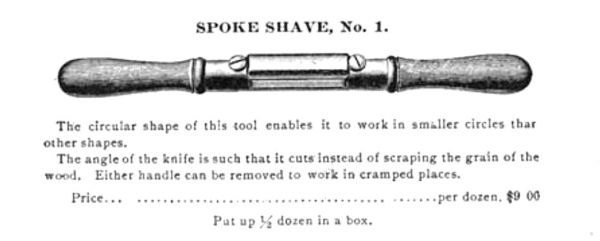
Fig. 2: Description from a 1904 Millers Falls catalog

This spokeshave originated from a patent issued to Albert D. Goodell of Millers Falls, Massachusetts in 1884 (Patent# 293,651).

patent293651

Fig.3: Drawing from the original patent No.293,651

In the patent, Goodell claims that the circular cutter is used in “order to obtain a clean cut instead of a scraping action, so common to most tools of the same purpose“. The opening in the body (see Fig.6) under the knife supposedly prevents clogging, and easy discharge of shavings. The semi-tubular blade is held onto the body of the spokeshave by means of two rounded headed set screws. As the blade overlaps the body, this prevents the cutter corners digging into the wood whilst cutting. This supposedly prevents chatter in the blade, and allows the user to skew the shave. Goodell also claimed that the tool will “work effectively in almost any position and upon either flat or round surfaces“.

MFno1_mech

Fig.4: Two views of the blade and mouth opening

MFno1_struct

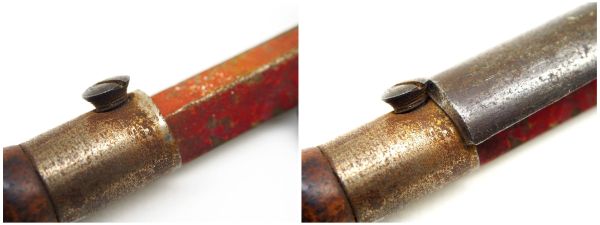
Fig.5: Structure of the spokeshave, without and with the blade attached

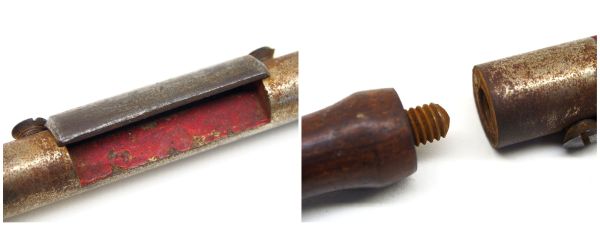
The length of the spokeshave is 10 inches. In early versions of the spokeshave, the handles are made of Cocobolo, and either side can be detached for working in cramped situations. In Fig.5 you can see the red portion of the spokeshave structure representing the throat of the plane, and the simplicity of the holding mechanism.

MFno1_misc

Fig. 6: The back opening of the spokeshave, and the  handle being detached

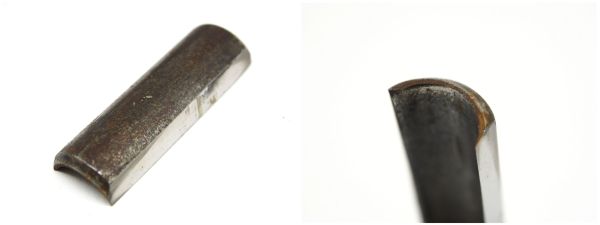
The shave was supposedly good for small-radius and concave work. There are two issues with the spokeshave. The first is that it is tricky to adjust the depth of the blade, requiring the blade to be moved manually, and each screw tightened independently. This means that adjusting the blade can’t be done as one continuous movement – tightening the screw on one side may invariably slide the blade along the other screw in a skewing fashion. The second issue is the difficulty in sharpening the blade, and likely requires some sort of a jig. The other caveat is the difficulty acquiring spare curved blades.

MFno1_blades

Fig.7: The curved blade

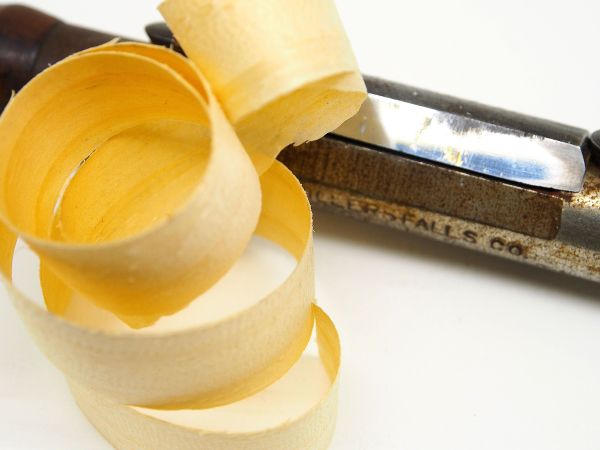
How well does it work? Adjusting the blade to the right depth is tricky, to say the least. Fine shavings need an extremely small mouth opening. The opening shown in Fig.8 is 1/32″, and the (rather thick) shaving is from a piece of pine, which was easy. Attempting to conjure a shaving from maple was more challenging – partially because it requires a force applied to the spokeshave which can cause movement in the blade (due to an inadequacy in the ability of the holding screws), and there is nothing impeding the blade from “rolling” backwards.

MFno1shaving

Fig.8: Sample shaving from the spokeshave

As to sharpening the blade, I did the test-piece with the blade as-is. Some have suggested that sharpening involves flattening the outside of the blade (I would try this manually on a diamond stone), and then adding a micro-bevel on the inside. More on this one day.

Virtuoso: The Tool Cabinet and Workbench of Henry O. Studley (a brief review)

A couple of months back I bought a copy of Virtuoso: The Tool Cabinet and Workbench of Henry O. Studley. Written by Donald C. Williams, conservator and scholar, and photographed by Narayan Nayar, it is an exceptional publication from Lost Art Press. On vacation at the cottage this summer, I finally found time to read it. The tool cabinet of Studley is probably the most well known cabinet in the woodworking community. This may be partially due to the aesthetic beauty of this cabinet, and the fact that the cabinet is hand-made, and specific to Studley’s trade of piano-making. It is also unique because of the complete absence of similar vintage tool cabinets, which is rather strange considering the number of companies which sold cabinets, usually with tools,  in their catalogs.

The book is composed of eight chapters, and is extremely well laid out. The photographic record of both the cabinet and workbench are exceptional. The first portion of the book deals with Williams’ endeavour to find the cabinet, and an insight into the life of Studley, tracing the lineage of the cabinet since its creation. Little is known about the actual construction of the cabinet, or its day-to-day use, which is unfortunate. Obviously the cabinet itself is a work of art, but did Studley plan it this way? Did he put a tool back in the cabinet after it’s use, or maybe only at the end of the day? Studley himself is somewhat of an enigma, with only one picture in existence, published in The Music Trade Review, March 30, 1918. It shows Studley in his workshop with the cabinet in the background shortly before his retirement.

The core portion of the book chronicles the tools within the cabinet and their arrangement. Encompassing nearly half the book (94/204 pages), Chapter 5 is a detailed review of the cabinet and its contents, exploring every nook and cranny. The tools themselves are often not as awe-inspiring as one would imagine, but then they were used to work with on a daily basis, and not just to look at. It is the cabinet itself, with its unique tool storage solutions, often layered three deep, and aesthetic design that are of appeal to the reader. The cabinet is made of mahogany, with embellishments in materials such as ebony, ivory and mother-of-pearl. From the visual dissection of the cabinet found in the book, one obtains a sense of the cabinet being utilitarian in one sense, and a work of art in the other. The interesting tools are the ones built by Studley himself for his trade.

Chapter 6 briefly alludes to “artistic flourishes”, such as inlays, which contribute to the cabinet’s overall aesthetic appeal. The final portion of the book examines the Studley workbench. Whilst the original base of the workbench is missing and has been reconstructed, the interesting aspect is of course the bench slab, and vises. The form of the bench-top is a curiosity, composed of a sandwich of laminated oak encapsulated with mahogany faces, and trimmed with ebony. The chapter concludes with an investigation of the unmarked handmade piano-makers vises and a compendium of similar bench/vise combinations which still exist.

Overall this is an extraordinary book, as both a reference guide, and a book to sit in the living room and invite discussion when friends visit. It may also spur some re-creations of similar cabinet. Ultimately it would be great to see the photographic exploration used in this book extended to other projects. For example a photographic record and evolutionary discussion of Stanley’s planes perhaps? Kudos to Lost Art Press for publishing a flawless manuscript, and to Williams and Nayar for their commitment to such a woodworking icon.

NB: The interested reader can read about building a replica of the workbench top on Don Williams blog.

Tools of the Trades – fall roundup

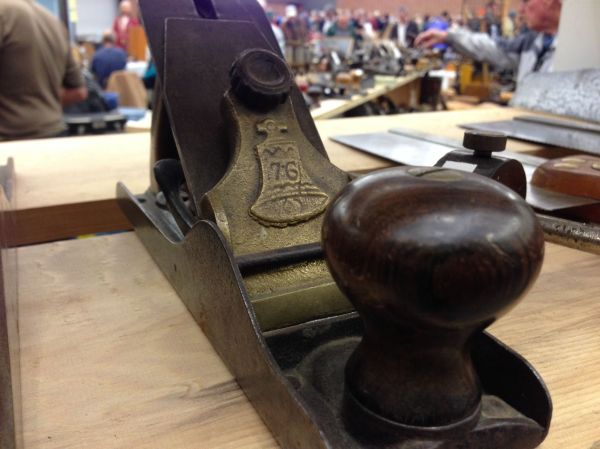
It is true, that the more tools you collect for your workshop, the harder it becomes to find new things. So it was with TotTs this weekend. Whilst there were many things, there were few block planes of interest. I had hopes for a Victor, but the regular dealer had none, and the Birmingham I looked at wasn’t complete. There were the usual assortment of No.4’s and No.5’s from Stanley, Millers Falls, and the like… but even then there didn’t seem to be *that* many.

totTpic1

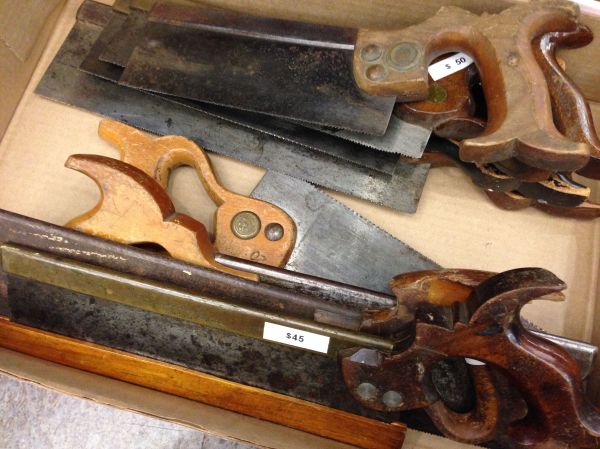
What tool was in abundance? Saws. A good assortment of handsaws from tenon to panel saws, ranging from $30 to $200. The lower end handsaws, often crosscut with thick brass spines sell from anywhere from $50-80, however all do need sharpening. There was one person selling refurbished saws, both crosscut and rip. Beautifully restored, well priced, and sharpened so that they cut through wood like it is butter.

totTpic2

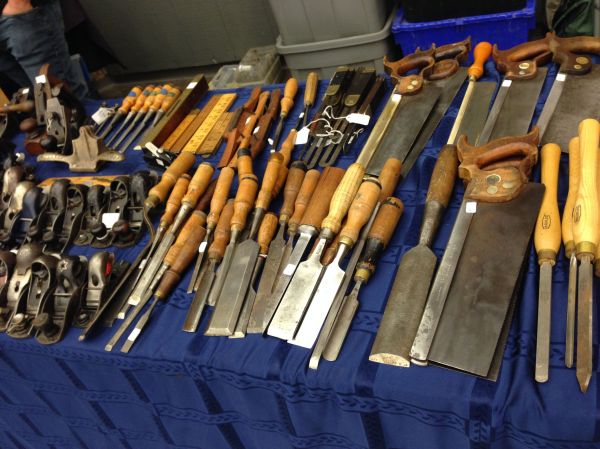
What else? Seemed to be a lot of chisels about, including a few sets from Swedish brand, Eskilstuna.

totTpic4

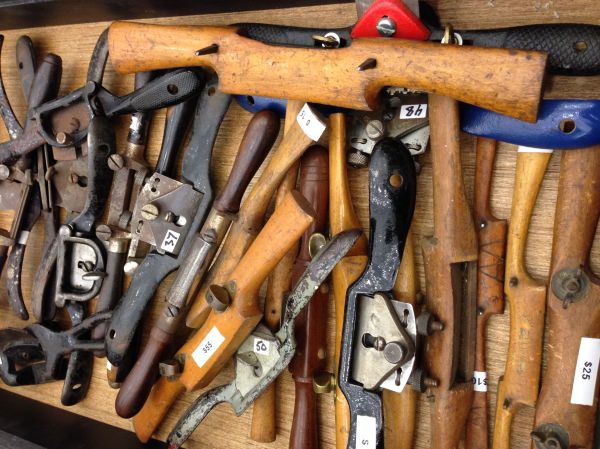
And of course a whole lot of spokeshaves – of every sort imaginable.

totTpic3

What did I buy? I refurbished Disston D-8, a set of four Jorgensen 10″ wooden handscrews ($50 for all 4), a wonderful Millers Falls #1, cigar spokeshave, and a German book on woodworking and design. Posts to come.

The “Oktoberfestool”

I love Festool, they make exceptional power tools. But last weekend at the viking chest workshop we used a Festool router table – and you really wonder if parts of this weren’t designed during Oktoberfest. The biggest fallacy? The height adjustment mechanism. There’s a picture of it below. Okay, so it is basically a removable crank that locks into a hex-bolt in the table. Turning the crank adjusts the router blade up or down. Okay, so that’s fine when you’re setting a height, and running a piece of wood straight through the router.

What happens if you set up a jig to do a blind dado, which requires moving the wood back and forth, whilst increasing the height of the bit after each pass – *without* having to remove the wood? It is impossible, because the crank handle actually interfere’s with the wood, or rather the wood ends up covering the access hole. Other router tables have their height adjustment mechanisms on the side of the table, not in the middle of the table. Why not just a single pass to cut ¾” deep? In hard wood such as maple, that’s just not viable – a number of short passes will help prevent the router bit blowing out.

The solution for some applications? Build an extension crank out of a ratchet socket wrench.

routerFT2

Below you can see the crank in action, with a mortice being cut through the blind dado on the inside of the chest to support the tenon of the chest floor. After two increases in the bit height, the router bit pops through the top of the wood. So this design feature of the Festool router table is not exactly well thought out. Better to have a side crank, like the router table from JessEm.

routerFT1

Ready for Tools of the Trades?

This Sunday, it is time for the fall “Tools of the Trades” at the Pickering Recreation Complex: October 4th – 10am to 3pm.

Time again to spend a couple of hours digging through some vintage tools. If you are a new to woodworking, looking to buy a set of starter tools for a reasonable price, there is no better show in Canada. There is always a good selection of vintage Stanley, British planes (Record), wooden planes, and a few Millers Falls and Sargents. Occasionally there are also some Japanese tools, and a *whole* bunch of wooden planes. You won’t find a better collection of vintage tools anywhere in Ontario or Quebec I would imagine.

TofTfall15ad